
Market structure · Pine Script v6
Downloads —
ICT Setup Builder+
Finds ICT entry zones from six models and turns qualifying setups into sized trade plans with liquidity targets.
Indicator guide
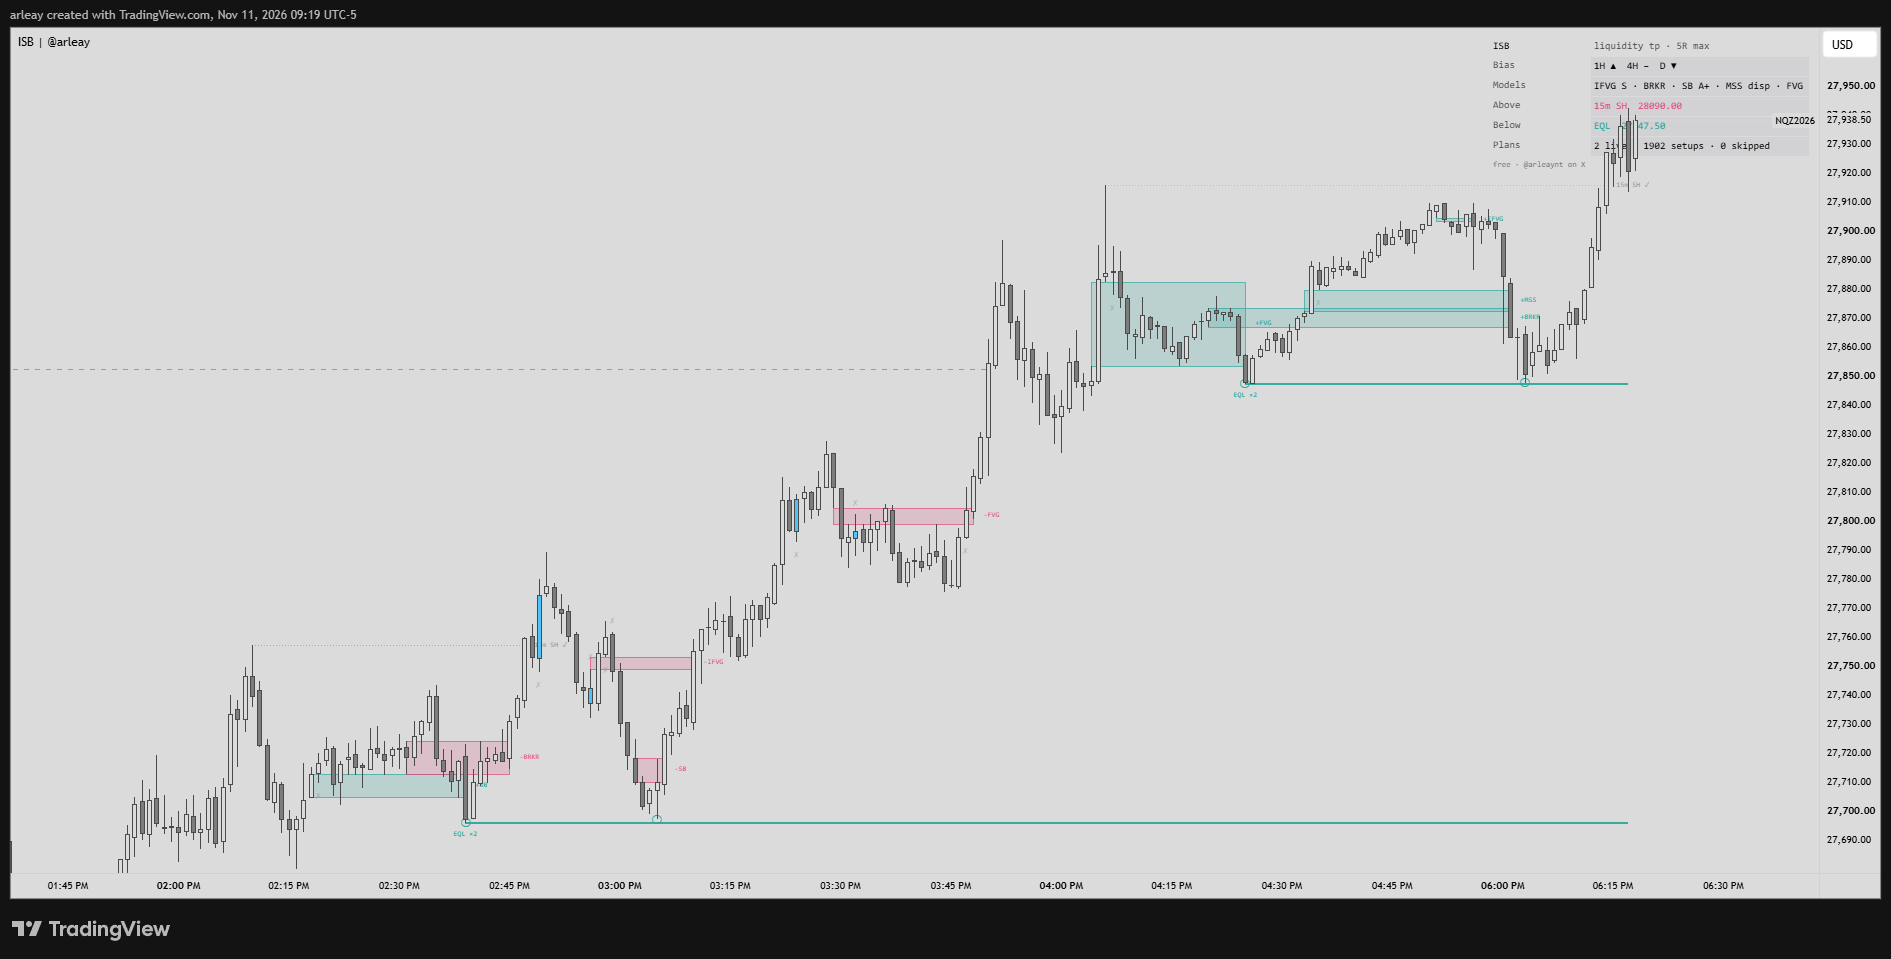
ICT Setup Builder finds ICT entry zones from six models, runs every zone through one shared set of filters, gives each surviving setup a target from a map of liquidity levels, and turns it into a sized trade plan. A setup with nothing to aim at, or whose nearest target sits more than 5R away, is skipped and marked instead of planned.
How It Works
The script works in a fixed order on every closed bar: the entry models find zones, the filters decide which zones may become setups, the liquidity map gives each setup a target or skips it, and the plan is drawn, sized and sent as one alert. Each step only uses what the step before produced, so the chart, the skip marks and the alert always describe the same decision. That shared order is why the models live in one tool rather than six.
Entry models
IFVG. A three-candle fair value gap whose middle candle closes beyond the first candle. A close through it within 5 bars of its middle candle inverts it into a zone the other way. Singular keeps only a gap that is the only one in its swing leg.
Breaker Block. A swing low, a swing high, a lower low through the first low, then a close above the swing high (bearish is the mirror). The zone is the run of up-close candles that built the high, at least 5 points tall. Unicorn also needs a same-direction gap of at least 2 points overlapping the zone, formed after the lower low and not closed through.
CISD. Each candle colour flip stores the open of the flip candle. A later close back through that open fires the model. The zone runs from that open to the extreme of the move it reversed. 2X keeps only the second CISD of a same-direction streak, when it sits beyond the first and the first has not been closed back through.
Suspension Block. Three candle bodies stepping the same way with a gap between each body. The zone is the middle body. A+ only needs three same-direction candles and a middle body of at least half its range. Inverse trades a block that price closes back through within 10 bars, in the new direction.
MSS + FVG. Swings use 5 bars each side and one structure state is held. A close through the last swing against that state is a shift. The first gap of at least 0.15 ATR in the new direction within 10 bars is the zone. A close back through the swing the move started from cancels it. Displaced needs a breaking candle body of at least one ATR.
FVG rejection. A gap of at least 0.1 ATR left by a strong move: 3 ATR within 15 bars, or one 1.5 ATR body. The very next candle must wick into the gap and close its body outside it. That candle is painted. All four candles must be in one trading day.
Filters (all off by default, each applies to every model)
HTF bias. Longs only when higher timeframe orderflow is bullish, shorts only when it is bearish. A timeframe's bias is the direction of its latest swing leg when that leg holds an open gap the same way; otherwise it is neutral, and neutral blocks both sides. Options: 15m, 1H, 4H, Daily, 15m + 4H, 1H + Daily.
Session. Asia 20:00-02:00, London 03:00-09:00, NY AM 09:30-12:00, NY PM 13:00-16:00, a custom window, or the eight ICT macros, shaded and named on the chart. New York time.
Liquidity sweep. A long needs one of the last five swing lows taken and closed back above, on that candle or the next, within the last 10 bars. Shorts mirror at swing highs. Each sweep can serve only one setup.
HTF FVG. A setup counts only while price trades from an open same-direction gap on the chosen timeframe, reached within the last 5 bars. The latest gaps are drawn while the filter is on.
Premium / Discount. A long needs its zone middle below the midpoint of the last 60 bars, a short above it.
MSS + FVG checks session, sweep and HTF FVG on its shift and premium / discount on its gap. Setups outside the chosen session are not marked, so skip marks stay inside the hours being traded.
Liquidity
Previous day and week high and low, Asia and London high and low, 15m / 1H / 4H swing highs and lows, equal highs and lows, and trendline liquidity (three or more swings stepping along one shallow line). Equal levels and trendlines that are not reached within 200 bars stop extending and are no longer targets. A trendline whose touches start getting taken, and which then swings the other way before reaching its start, is removed.
Trade plan
Entry is Market (the setup candle's close) or Zone edge (a limit at the near edge, cancelled after 20 bars, replaced by a newer setup in the same direction). The stop goes beyond the swing the setup formed from plus 2 ticks, or beyond the zone's far edge, which is also the fallback. The take profit is the first untaken liquidity level beyond the entry, or a fixed multiple of the risk. Size is the dollar risk divided by the stop distance times the point value, rounded down. If one contract already risks more, the plan shows that amount and how many micros fit on NQ, ES, YM, RTY, GC and CL. When a plan ends it is labelled with its result, for example +2.4R at the level it reached, -1R, missed, replaced or expired.
Key Features
- Six entry models, each Off, On or a stricter variant
- Zones kept per model and per side, so the chart stays readable
- One filter layer shared by all models
- One sweep, one setup across every model
- Grey skip marks with the reason in the tooltip
- ICT macros shaded and named
- Liquidity map with day, week, session, HTF swing, equal level and trendline pools
- Circled touches on equal levels and trendlines
- First-liquidity take profit with a 5R cap
- Plans drawn as a position with size and result
- Fixed dollar risk sizing with a micro fallback
- Optional limit entries with expiry and replacement
- Target levels that an open plan aims at stay visible until the plan ends
- Compact dashboard: bias, models, nearest liquidity above and below, live filter states, setup and skip counts
- Warning when one side has no liquidity to target
- One alert that carries the full plan, optional trade-update alerts
- Advanced settings locked until unlocked, so nothing changes by accident
How to Use
Use an intraday futures chart from 1 to 15 minutes. The ICT macros need 15 minutes or less. Turn models on one at a time and add filters one at a time; the skip marks show what each one removed and why before you keep it. Show every zone draws everything a model finds, faded, not only the setups.
The read is always the same:
- Which model formed the zone and which side it faces
- Whether the filters let it through, or why they did not
- Which liquidity level the plan aims at and how far away it is in R
Settings
Entry models: IFVG, Breaker Block, CISD, Suspension Block, MSS + FVG, FVG rejection, zones kept per side, show every zone, rejection candle colour.
Filters: HTF bias, session and custom window, macro shading and colour, liquidity sweep, HTF FVG and timeframe, premium / discount.
Liquidity: day, week, Asia / London, HTF swings and timeframe, equal highs / lows, trendlines.
Advanced: show trade plans, entry, stop and tick offset, take profit and R, max R to liquidity, risk, plans shown, skipped setups, hide mitigated, trade-update alerts, dashboard position and size.
Style: bull, bear, buyside, sellside, HTF swing, target and stop colours, text size.
Defaults: IFVG Singular, Breaker, Suspension Block A+ only, MSS + FVG Displaced and FVG rejection on, CISD off, filters off, all liquidity on with 15m swings, market entry, swing stop plus 2 ticks, liquidity target, 5R cap, $500 risk, plans hidden.
Alerts
Create one alert with "Any alert() function call". It sends each setup once at bar close with direction, model, entry, stop, target and size. "Also alert trade updates" adds a message when a limit fills, the target or stop is hit, or a limit is missed or expires. "Long setup" and "Short setup" are also available for direction-only alerts.
Limitations
- This is an indicator. It plans trades but does not place them.
- Plan results come from chart bars without commission or slippage. A bar that touches both stop and target counts as a loss. The bar that fills a limit can stop it out but never counts toward its target.
- Swings, sweeps, equal levels and trendlines are confirmed a few bars after the swing that forms them.
- The Breaker 5 point and Unicorn 2 point thresholds are set for NQ and MNQ. Other thresholds are in ATR and scale with the symbol.
- Higher timeframe filters need a timeframe above the chart's.
- TradingView allows 500 boxes, lines and labels per script, so on long charts the oldest drawings drop off.
- Liquidity pools that fail are removed, so history shows fewer pools than were visible live.
- Use standard candles. Heikin Ashi, Renko, Kagi, Point & Figure, Line Break and Range charts give wrong levels.
Tips
- Start with one model and no filters, then add one filter at a time and watch the skip marks.
- If too many setups are skipped for no target, turn on more liquidity types before raising the R cap.
- The HTF bias filter removes the most counter-trend setups; 1H is a reasonable first choice.
- Zone edge entries give a tighter stop but miss more fills than market entries.
- Use the macros only on 15 minute charts or lower.
- Read the dashboard's warning row before trusting a quiet chart: it may mean one side simply has nothing to aim at.
For educational purposes only. This is not financial advice. No win rate, accuracy or performance figure is claimed. Test any approach yourself before risking money.